Heat Pump Installation UK: What to Expect
What actually happens when you get a heat pump installed in the UK — survey, design, BUS voucher, install day, commissioning. Practical and MCS-aligned.
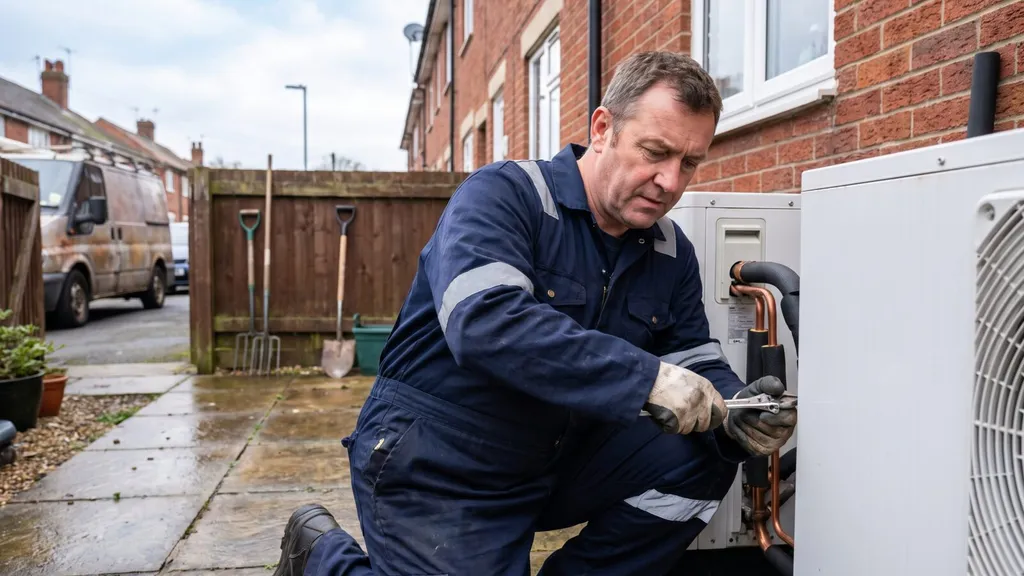
A typical UK heat pump installation takes 2–3 days on site for a straightforward air source retrofit, or 4–5 days for ground source or complex jobs. The full process from accepting a quote to commissioning runs 5–9 weeks, including the MCS survey, BUS voucher approval (typically 2–4 weeks via Ofgem), unit lead time, and install day(s) themselves. Most of what determines whether you're happy with the system in five years' time is set during the survey and commissioning stages, not the install itself.
The five-stage process: (1) survey with room-by-room heat-loss calculation, (2) design and quotation with itemised radiator schedule and design flow temperature, (3) pre-install prep (any radiator/pipework upgrades, electrical capacity check), (4) install day(s) on site, and (5) commissioning where weather compensation curves are dialled in and MCS paperwork is issued.
Here's what should happen at each stage, what good looks like, and where corner-cutting tends to show up.
Stage 1 — the survey
An MCS-certified installer should survey your property before quoting. A proper survey typically takes 1–2 hours and covers:
- Your current heating system, controls and pipework layout
- A room-by-room heat-loss calculation to EN 12831 / CIBSE Domestic Heating Design Guide
- Every radiator measured for height, length and depth (K1/K2/K3)
- Pipe sizes — 8 mm and 10 mm microbore can be a problem at heat pump mass flows
- Insulation: loft, walls, floors, draughts, window age
- Hot water demand — number of bathrooms, baths versus showers, household routine
- Where the outdoor unit will go — clearances, noise lines to neighbours, planning
- The electrical supply — main fuse rating, consumer unit capacity, DNO requirements
No survey, no deal
If an installer quotes without a proper survey, walk away. Heat pump sizing is the single most important design decision. Too small and you'll be cold; too large and the pump will short-cycle, wear out faster, and run at a poor SPF. MCS standard MIS 3005-D requires the installer to produce a documented heat-loss calculation for every room — make sure that spreadsheet is part of your quote pack.
Stage 2 — design and quotation
After the survey, the installer designs the system: heat pump model, design flow temperature, cylinder size and coil rating, radiator schedule, pipework changes, control strategy. A good quote includes all of these as itemised line items — not a single lump sum with "heat pump install" written on it.
What to look for in the design pack:
- Room-by-room heat loss — every room listed with calculated heat demand in watts
- Design flow temperature — should be 35°C (underfloor), 45°C (well-sized radiators), or 50°C (decent retrofit). 55°C and above is a warning sign
- Radiator schedule — current rad size, output at design flow temp, target output, replacement or keep
- Cylinder spec — size in litres, coil surface area (should be 2.5–3.5 m² for a heat pump cylinder, not 1.0–1.5 m² as fitted with gas boilers)
- Heat pump model and declared SCOP — and an estimated real-world SPF using the MCS 031 methodology
- BUS voucher application — with the £7,500 grant deducted (or £9,000 from July 2026 for oil/LPG)
- Sound assessment — under MCS 020 (or MCS 020(a) from 28 May 2026 onwards)
Get two or three quotes and compare the designs, not just the prices. A £14,000 quote with proper radiator sizing and a 50°C design flow temp will deliver lower running costs for twenty years than a £10,500 quote with no radiator changes and a 55°C design flow temp.
Stage 3 — pre-installation prep
Before installers arrive, a few things may need doing:
- Radiator upgrades — heat pumps run at lower flow temperatures than boilers (typically 35–50°C vs 70–80°C), so undersized radiators may need swapping. A K1 → K2 swap is the most common, often the same wall footprint and a quick plumbing change.
- Pipework — main flow and return pipes from the heat pump to the manifold/cylinder may need upsizing (typically 22 mm to 28 mm).
- Base for the outdoor unit — a concrete pad or proprietary anti-vibration plinth on a level base.
- Electrical capacity — your existing consumer unit may need an additional way, or in some cases a replacement. Properties with 60 A main fuses may need a DNO upgrade (free in most regions, but timing varies).
- Cylinder space — if you're coming from a combi, you'll need somewhere for a 180–300 litre cylinder. Typically an airing cupboard, utility room, loft (with frost protection) or garage.
Stage 4 — installation days
A straightforward air source retrofit typically takes 2–3 days. More complex jobs — ground source, extensive radiator upgrades, cylinder relocation, consumer unit replacement — can run to 4–5 days. A rough breakdown:
Day 1
- Old boiler decommissioned, isolated, and removed
- Outdoor unit positioned and secured to its base, anti-vibration mounts fitted
- Refrigerant or hydraulic lines run between outdoor and indoor components
- Hot water cylinder positioned and connected to mains and DHW outlets
- Any pipework changes inside (rad swaps, pipe upsizing)
Day 2
- Connections to the heating circuit completed and pressure-tested
- Electrical connections and dedicated circuit for the heat pump
- Controls wired and configured
- System filled, vented, pressurised, leak-tested
- Antifreeze added to monobloc systems (typically 25–33% propylene glycol)
Day 3 — commissioning
- System fired up and run through various conditions
- Flow rate verified against manufacturer minimum (typically 2–3 L/min per kW)
- Weather compensation curve set to match the design — not left on factory defaults
- DHW priority logic configured
- Legionella cycle scheduled (typically weekly to 60°C using the immersion)
- Defrost cycle tested
- MCS Compliance Certificate issued, Building Control notified
- Handover — how to use the controls, what to expect day-to-day
Commissioning is the single biggest determinant of your real running cost
DESNZ's Electrification of Heat trial found a roughly 1.0-point gap between declared SCOP and in-situ SPF for installs from 2017–2022. The gap is mostly down to commissioning quality — installers leaving factory defaults on, not setting weather compensation properly, or running flow temperatures higher than the design called for. A good commission takes half a day, not half an hour.
Stage 5 — what to expect after installation
Heat pumps work differently to boilers. They deliver heat more gently — lower flow temperatures, running for longer periods rather than the short blasts you're used to. This is normal, by design, and where the efficiency comes from. The adjustment period is real:
- Radiators feel warm, not hot — this is correct at 45–50°C flow temp. A radiator that's just warm to the touch is doing its job; one that's hot enough to burn you is wasting energy.
- The system runs for more hours per day — heat pumps work best running steadily, not in short blasts.
- Setbacks don't help — turning the heating off when you're out and blasting it back on when you return uses more energy than running steadily, with a heat pump.
- Weather compensation takes a season to dial in — the system adjusts output based on outdoor temperature, and the curve needs tweaking after the first cold spell.
- Hot water takes longer to reheat — typically 1–2 hours after a heavy use, versus 20–30 minutes for a boiler.
- The unit will defrost in damp cold weather — a brief, slightly louder cycle every 30–60 minutes when conditions favour ice forming. Normal.
Give it a full heating season before judging performance. Most "my heat pump doesn't work" complaints come from the first few weeks when the system hasn't been optimised and the homeowner is still re-learning how to run the heating.
Noise and planning
Most domestic ASHP installs in England qualify as permitted development (no planning permission needed) provided the sound level meets MCS 020 — currently 42 dB(A) at 1 m from the nearest habitable room window of any neighbouring property. From 28 May 2026 this tightens under MCS 020(a) to 37 dB LAeq, 5-minute, at the same assessment positions. A good installer will run the sound assessment as part of design and tell you upfront if you need to apply for planning permission.
Red flags when comparing quotes
- Installer quotes without surveying your property properly
- No room-by-room heat loss calculation in the quote pack
- Design flow temperature of 55°C or higher (suggests rad sizing has been skipped)
- No MCS certification — search them at mcscertified.com
- Pressure to make a quick decision, "today only" pricing, or a "free" consultancy visit that becomes a sales pitch
- The cheapest quote by a wide margin (£3,000+) than the others — usually means something significant has been omitted
- No clear cylinder specification or coil rating
- No mention of commissioning time or weather compensation
A good installer takes their time, explains their recommendations, and isn't allergic to questions. The BUS grant isn't going away tomorrow — it's now extended to 2030 — so take the time to choose well.
Sources & further reading
- MIS 3005-D Heat Pump Design Standard V2.0 — MCS
- MIS 3005-I Heat Pump Installation Standard — MCS
- MCS 020(a) Sound Assessment for Heat Pumps — MCS — mandatory from 28 May 2026
- Find an MCS-certified installer — MCS
- Electrification of Heat Demonstration: Final Report — Energy Systems Catapult / DESNZ
Editorial standards
How this guide was put together
Independent
Editorially independent UK guides — no sponsored content
Primary sources
Every guide cites gov.uk, Ofgem, MCS and manufacturer data
Current
Updated as schemes, prices and regulations change
Ready to find a good installer?
Speak to MCS-certified heat pump installers in your area.
Get Free Quotes